Top
SD Optics provides precision inspection system required in each process of manufacturing camera modules.From single lens inspection to camera module finished production,We have optimum solution to each process inspection and its requirements.
SD Optics provides precision inspection system required in each process of manufacturing cameramodules. From single lens inspection to camera module finished production,We have optimum solution to each process inspection and its requirements.
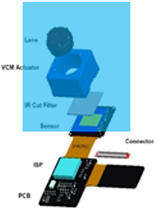
| System | Inspection Area | Status |
|---|---|---|
| Single Lens Inspection System | Lens top, bottom side inspection | In Production |
| Lens Barrel Inspection System | Lens barrel top, bottom side inspection | In Production |
| Lens Ass’y Inspection System | Lens ass’y each lens top, bottom side inspection Lens barrel top, bottom, side surface inspection Iris and flare inspection | In Production |
| Lens Flare Inspection System | ||
| VCM-Lean Ass’y Inspection system | IR filter top, bottom side inspection (AR/IR) Outer surface of the last lens inspection | In Production |
| IR Attach-VCM Ass’y Inspection System | Outer surface of the IR Filter top and bottom side inspection afterVCM and IR filter assembly | In Production |
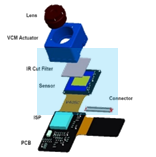
| System | Inspection Area | Status |
|---|---|---|
| Image Sensor Inspection System | Effective area of image sensor inspection | In Production |
| IR Attached Image Sensor Inspection System | Effective area of image sensor and IR filter top and bottom side inspection | In Production |

| System | Inspection Area | Status |
|---|---|---|
| Camera Module 6-side Inspection System | 6-surface of the camera module and FPCB | In Production |
Lens & Ass’y
Digital Optic Koren CNO Bangjoo Sekonix N2A Haesung JAESUNG

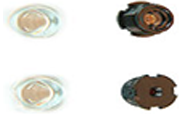
Lens Ass’y + IR
Attach & VCM
UBIS Bangjoo Haesung Mir Cam IM Jahwa Hisonic Optron

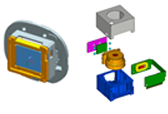
Camera Module
Foxconn SEMCO SEC LGIT Patron CAMSYS MCNEX Nanos NAMUGA Cowell CRESIN HNT

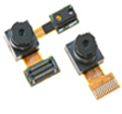
Mobile
SEC LG Apple ZTE HTC

- Non-automated microscope
- Worker’s visual inspection
- Focus controlled manually by workers
- Different result by workers
- No automated vari-focus technology
- Workers’ condition causes inaccuracy and
poor repeatability
→ High overkill and underkill
- 3 shifts/day causes labor cost increase
- Poor productivity due to many overkill
- Underkill causes post-processing cost increase
- Impossible to set and maintain a clear
inspection criteria
- Limit of inspection result documentation
- Insufficient experienced worker
- High turnover due to difficult work condition
- Vari-Focus vision basis
- Automation algorithm
- Automated interlayer analysis
- Result of interlayer analysis
- Excellent repeatability due to automation
- Different defect criteria by inspection field
- Detection of micron defect such as stain, etc.
- Production increase using auto inspection
- Minimize overkill using optimized algorithm
- Save post-processing cost by controlling underkill
- Inspection standardization
- One step inspection and defect analysis
- Inspection result database
- Production control by defect type
- Several machines control per person
Inspection
Method
Interlayer
Analysis
Inspection
Result
Productivity
Difference
- Lens top/bottom side inspection- Particle, black/white dot, bubble, scratch, contamination, coating error inspection- Using the combination of multi illumination system
| Items | SD Optics | Remark |
|---|---|---|
| Min. Defect size | ≤ 12um | Base on short side of defect |
| Detect defection type |
Particle, Black dot, White dot, Bubble, Scratch, Contamination, Coating error |
Inspection area : Lens top/bottom |
| Underkill | ≤ 0.5% | - Base on mass production product 2,000ea |
| Overkill | ≤ 2% | - Not including ±1 pixel size deviation, secondary contamination, Visual inspector error |
| Repeatability | 97% | - Not including less than 30 gray value defect |
| Cycle Time | 0.35 sec/ea. | - 180ea products/tray, Magazine to Magazine |
| Vision System | Top : 4M x 2 sets, Bottom : 4M x 2 sets | Option: Color camera, Dual Magazine |
| Pixel resolution | 6.1um | |
| FOV | 12mm x 12mm | |
| Light | Multi-light system | Designed by SD OPTICS |
| NG product | Marking | |
| Tray loading | 20 coating trays/magazine |
- Lens top/bottom side, Barrel inspection- Particle, black/white dot, bubble, scratch, contamination, coating error inspection- Auto NG Sorting system
| Items | SD Optics | Remark |
|---|---|---|
| Min. Defect size | ≤ 12um | Base on short side of defect |
| Detect defection type |
Particle, Black dot, White dot, Bubble, Scratch, Contamination, Coating error,Barrel, and so on. |
Inspection area : Lens top/bottom, Barrel top/bottom(Option : Barrel Side) |
| Underkill | ≤ 1% | - Base on mass production product 2,000ea |
| Overkill | ≤ 6% | - Not including +1 pixel size deviation, secondary contamination, Visual inspector error |
| Repeatability | ≥ 95% | - Not including less than 30 gray value defect |
| Cycle Time | 2.0 sec/ea. | - 100ea products/tray, Magazine to Magazine |
| Vision System | Top : 4M x 2 sets Bottom : 4M x 2 sets |
Option 1) Barrel Side Inspection vision 2. Iris inspection vision(Check assembled of not) Option 2) Iris inspection vision (check if assembled or not) |
| Pixel resolution | 6.1um | |
| FOV | 12mm x 12mm | |
| Light | Multi-light system | Designed by SD OPTICS |
| NG product | Sorting | |
| Tray loading | 10 trays/magazine |
- Lens top/bottom/side/inside of lens ass’y barrel- Iris inside of lens ass’y- Lens flare inspection- Auto NG Sorting system
| Items | SD Optics | Remark |
|---|---|---|
| Min. Defect size | ||
| Detect defection type |
Flare | |
| Underkill | ≤ 0.6% | - Base on mass production product 2,000ea |
| Overkill | ≤ 6% | - Not including ±1 pixel size deviation, secondary contamination, Visual inspector error |
| Repeatability | ≥ 95% | - Not including less than 30 gray value defect |
| Cycle Time | 2.3 sec/ea. | - 100ea products/tray, Magazine to Magazine |
| Vision System | Pre-focus vision 1 set | Pre-align vision system |
| Pixel resolution | Using customer’s Image sensor | |
| FOV | - | |
| Light | LED Array | Designed by SD OPTICS |
| NG product | Sorting | |
| Tray loading | 10 trays/magazine |
Customer Image
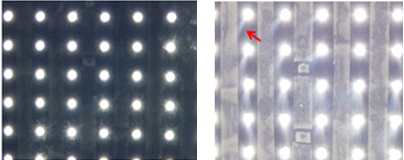

Results Image

- Barrel Top/Bottom/Side inspection, barrel inside inspection- Particle, dent, scratch, contamination, coating error- Using the combination of multi illumination system
| Items | SD Optics | Remark |
|---|---|---|
| Min. Defect size | 20um | Base on short side of defect |
| Detect defection type |
Particle, Dent, Scratch, Conramination, Coating error |
Inspection area : Barrel Top/Bottom/Side, Barrel inside |
| Underkill | ≤ 1% | - Base on mass production product 2,000ea |
| Overkill | ≤ 6% | - Not including ±1 pixel size deviation, secondary contamination, Visual inspector error |
| Repeatability | ≥ 95% | - Not including less than 30 gray value defect |
| Cycle Time | 2.0 sec/ea. | - 100ea products/tray, Magazine to Magazine |
| Vision System | Bottom : 2M x 1 set, Side : 2M x 1 set Inside : 2M x 1 set, Top : 4M x 2 sets (color) |
|
| Pixel resolution | 7.6um | |
| FOV | 14mm x 14mm | |
| Light | Multi-light system | Designed by SD OPTICS |
| NG product | Sorting | |
| Tray loading | 10 trays/magazine |
- IR Filter top/bottom & Lens top side inspection- Particle, black dot, white dot, bubble, scratch, contamination, coating error, bonding error- Using the combination of multi illumination system
| Items | SD Optics | Remark |
|---|---|---|
| Min. Defect size | ≥ 15 um ≥ 15 um ≥ 30 um |
IR filter AR side IR filter AR side Lens top side |
| Detect defection type |
Particle, Black dot, White dot, Bubble, Scratch, Contamination, Coating error, Bonding error |
Inspection area : IR Filter Top/Bottom & Lens top side |
| Underkill | ≤ 0.2% | - Base on mass production product 2,000ea |
| Overkill | ≤ 8% | - Not including ±1 pixel size deviation, secondary contamination, Visual inspector error |
| Repeatability | ≥ 95% | - Not including less than 30 gray value defect |
| Cycle Time | 0.9 sec/ea. | - Base on dual line concept |
| Vision System | 4M x 1 set | |
| Pixel resolution | 6.1um | |
| FOV | 12mm x 12mm | |
| Light | Multi-light system | Designed by SD OPTICS |
| NG product | Sorting | |
| Tray loading | 5 trays/magazine |
- Effective area of image sensor inspection- Particle, contamination- Using the combination of multi illumination system
| Items | SD Optics | Remark |
|---|---|---|
| Min. Defect size | ≥ 1 um | |
| Detect defection type |
Particle, contamination | Image sensor effective area |
| Underkill | ≤ 0.5% | - Base on mass production product 2,000ea |
| Overkill | ≤ 2% | - Not including ±1 pixel size deviation, secondary contamination, Visual inspector error |
| Repeatability | ≥ 97% | - Not including less than 30 gray value defect |
| Cycle Time | 1.5 sec/ea. | - Excluding the Loading/Unloading time by operator |
| Vision System | Top : 4M x 1 set | |
| Pixel resolution | 4.23um | |
| FOV | 10mm x 10mm | |
| Light | Multi-light system | Designed by SD OPTICS |
| NG product | Manual (Cleaning by operator) | Using 20x Microscope |
| Tray loading | 1 strip | Manual |
- Top side of camera module inspection- Particle, scratch, contamination, poron shift, FPCB, Connector- Using the combination of multi illumination system
| Items | SD Optics | Remark |
|---|---|---|
| Min. Defect size | ≥ 50 um ≥ 150 um |
Lens top Poron, FPCB, connector |
| Detect defection type |
Particle, Scratch, Contamination Poron shift, FPCB, Connector |
Inspection area : Module top side |
| Underkill | ≤ 0.25% | - Base on mass production product 2,000ea |
| Overkill | ≤ 5% | - Not including ±1 pixel size deviation, secondary contamination, Visual inspector error |
| Repeatability | ≥ 97% | - Not including less than 30 gray value defect |
| Cycle Time | 2.5 sec/ea. | - Excluding the Loading/Unloading time by operator |
| Vision System | Module top side : 4M x 2 sets | |
| Pixel resolution | 6.1 um / 11.4 um | |
| FOV | 12.5 x 12.5 / 23.2 x 23.2 (mm) | |
| Light | Multi-light system | Designed by SD OPTICS |
| NG product | Sorting | |
| Tray loading | 1 tray | Loading/Unloading by operator |
- 6-surface of the camera module top/side/bottom inspection- Particle, scratch, contamination, poron shift, FPCB, Connector stiffener- Using the combination of multi illumination system
| Items | SD Optics | Remark |
|---|---|---|
| Min. Defect size | ≥ 50 um ≥ 50 um |
Lens top side Poron, FPCB, connector |
| Detect defection type |
Particle, Scratch, Contamination Poron, FPCB, Connector stiffener |
Inspection area : Module top/ Side/Bottom |
| Underkill | ≤ 0.2% | - Base on mass production product 2,000ea |
| Overkill | ≤ 5% | - Not including ±1 pixel size deviation, secondary contamination, Visual inspector error |
| Repeatability | ≥ 97% | - Not including less than 30 gray value defect |
| Cycle Time | 2.1 sec/ea. | - Base on Mass production product 5 LOTs (60 ea./Tray) |
| Vision System | 5M x 9 sets | Color camera |
| Pixel resolution | 3.8 um / 5.8 um | |
| FOV | 9.3 x 7.9 / 16.2 x 13.7 (mm) | |
| Light | Multi-light system | Designed by SD OPTICS |
| NG product | Sorting | |
| Tray loading | Magazine |
Chipping on Barrel
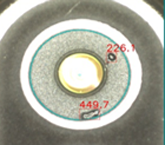
Damages on Connector
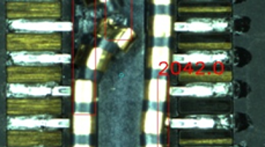
Lens Scratch
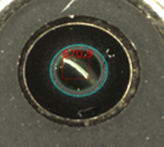
Dent on Shield can
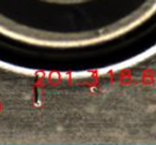
Lack of epoxy
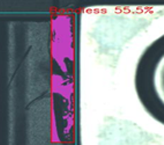
- Bar type flash lens top/bottom side inspection- Particle, black dot, white dot, scratch, contamination- Auto NG sorting system
| Items | SD Optics | Remark |
|---|---|---|
| Min. Defect size | ≥ 30 um | Base on short side of defect |
| Detect defection type |
Particle, Black dot, White dot, Scratch, Contamination |
Inspection area : Lens Top, Bottom |
| Underkill | ≤ 0.5% | - Base on mass production product 2,000ea |
| Overkill | ≤ 2% | - Not including ±1 pixel size deviation, secondary contamination, Visual inspector error |
| Repeatability | ≥ 97% | - Not including less than 30 gray value defect |
| Cycle Time | 1.2 sec/ea. | - 32ea products/tray - Dual line concept |
| Vision System | Top: 4M x 2 sets, Bottom: 4M x 2 sets | |
| Pixel resolution | 6.1 um | |
| FOV | 12mm x 12mm | |
| Light | Multi-light system | Designed by SD OPTICS |
| NG product | Sorting | |
| Tray loading | Stack | 40 tray at once |
- Single type flash lens top/bottom and side inspection- Particle, black dot, white dot, scratch, contamination- Using the combination of multi illumination system
| Items | SD Optics | Remark |
|---|---|---|
| Min. Defect size | ≥ 30 um | Base on short side of defect |
| Detect defection type |
Particle, Black dot, White dot, Scratch, Contamination |
Inspection area : Lens Top, Bottom, Side |
| Underkill | ≤ 0.5% | - Base on mass production product 2,000ea |
| Overkill | ≤ 3% | - Not including ±1 pixel size deviation, secondary contamination, Visual inspector error |
| Repeatability | ≥ 95% | - Not including less than 30 gray value defect |
| Cycle Time | 1.3 sec/ea. | - 60ea products/tray |
| Vision System | Top: 4M x 2 sets Bottom: 4M x 2 sets Side: 4M x 2 sets |
|
| Pixel resolution | 6.1 um | |
| FOV | 12mm x 12mm | |
| Light | Multi-light system | Designed by SD OPTICS |
| NG product | Sorting | |
| Tray loading | Stack | 40 tray at once |
- VR/AR lens top/bottom and side inspection- Particle, black dot, white dot, bubble, scratch, contamination- Using the combination of multi illumination system- Auto NG sorting
| Items | SD Optics | Remark |
|---|---|---|
| Min. Defect size | ≤ 50um | |
| Detect defection type |
Particle, Black dot, White dot, Bubble, Scratch, Contamination |
Inspection area : Lens top/bottom |
| Underkill | ≤ 0.5% | - Base on mass production product 2,000ea |
| Overkill | ≤ 3% | - Not including ±1 pixel size deviation, secondary contamination, Visual inspector error |
| Repeatability | ≥ 95% | - Not including less than 30 gray value defect |
| Cycle Time | 4sec/ea | - 1 lens/tray |
| Vision System | Top : 25M x 2 sets, Bottom : 25M x 1 sets | |
| Pixel resolution | 13.1um | |
| FOV | 60mm x 60mm | |
| Light | Multi-light system | Designed by SD OPTICS |
| NG product | Sorting | |
| Tray loading | Stack |
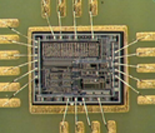
- Defect before and after wire bonding in module - Bumped ball size, ball interval, ball~edge interval length, scratch, chipping, defect - Defect Marking / Mapping
| Items | SD Optics | Remark |
|---|---|---|
| Min. Defect size | 5um | Base on short side of defect |
| Detect defection type |
Bumped Ball size, Ball Interval, Ball to Edge Interval length, scratch, Chipping, Defect |
|
| Underkill | ≤ 1% | - Base on mass production product 2,000ea |
| Overkill | ≤ 6% | - Not including ±1 pixel size deviation, secondary contamination, Visual inspector error |
| Repeatability | ≥ 95% | - Not including less than 30 gray value defect |
| Cycle Time | 0.75sec/ea | |
| Vision System | Top : 4M 2sets | Base on dual line concept |
| Pixel resolution | 1.6um | |
| FOV | 3.2mm x 3.2mm | |
| Light | Multi-light system | Designed by SD OPTICS |
| NG product | Laser Marking | |
| Tray loading | Magazine |

- Live 3D visual display - Auto-Focus, Multi focus, AIF Image function - SW package (Auto-measure, data management, create&edit, etc) - Lighting control for each illuminations
| Items | SD Optics | Remark |
|---|---|---|
| Stage moving range | 500 x 350 x 100 | XYZ, mm |
| WS Magnification | 1.3 x | |
| FOV (mm) | 8.5 x 8.5 | |
| Scanning Depth | 6.1 mm | |
| Depth Resolution | 19.2 um | |
| Accuracy | ± 10 um | |
| Illumination | 24 sector control system | SD in-house made |
- Acquisition High precision color image based on In-Focus color image- Acquisition of three illuminations images at the same location- Real-time Focusing Ability for LDI Inspection Surface
| Items | Description | Remark |
|---|---|---|
| Product | COG Upgrade | |
| Size / Weight | 1,640(W) x 1,300(D) x 2,360(H), 1.5 ton | |
| Min. Defect Size | 6μm | |
| UPH | ≥ 6,000 UPH | (4” tray, 3x33 array, Dual Illumination, defect rate 3%) |
| ≥ 3,700 UPH | (2” tray, 2x20 array, Dual Illumination, defect rate 3%) |
|
| Detectability | Underkill ≤ 0.1% Overkill ≤ 1% Repeatability ≥ 95% |
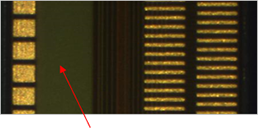
Dark area inspection
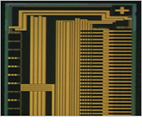 Coaxial Illumination
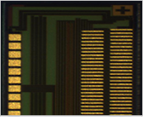 Bump illumination
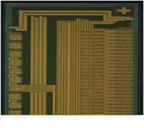 Multi illumination
- Precision measuring defects in the interlayer of flat or curved display
| Items | Spec | Remark |
|---|---|---|
| WS Magnification | 7.5 x | |
| FOV (mm) | 2.3 x 2.2 | |
| Scanning Depth | 0.688mm | |
| Depth Resolution | 2.15um | |
| Accuracy | ± 5um | Scanning range 1.45mm |
| Measuring T/T | 84 sec / 120 cut |
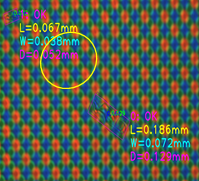 Material(defect) transparency
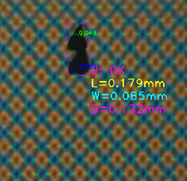 Defect on Curved Surface
- Detection of micro crack on the flat and curved display
| Items | Spec | Remark |
|---|---|---|
| WS Magnification | 2.3 x | |
| FOV (mm) | 5.5 x 5.5 | |
| Scanning Depth | 4.9mm | |
| Depth Resolution | 15.5um | |
| Accuracy | ± 6um | Scanning range 1.45mm |
| Measuring T/T | - | Depends on the required insp. spec |
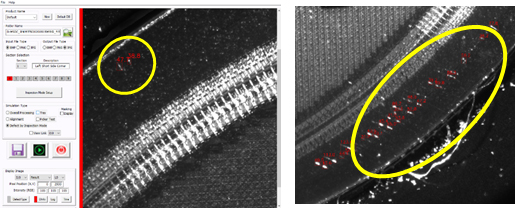 Detection of the crack on the curved surface